Seal Leaks Quick and Easy
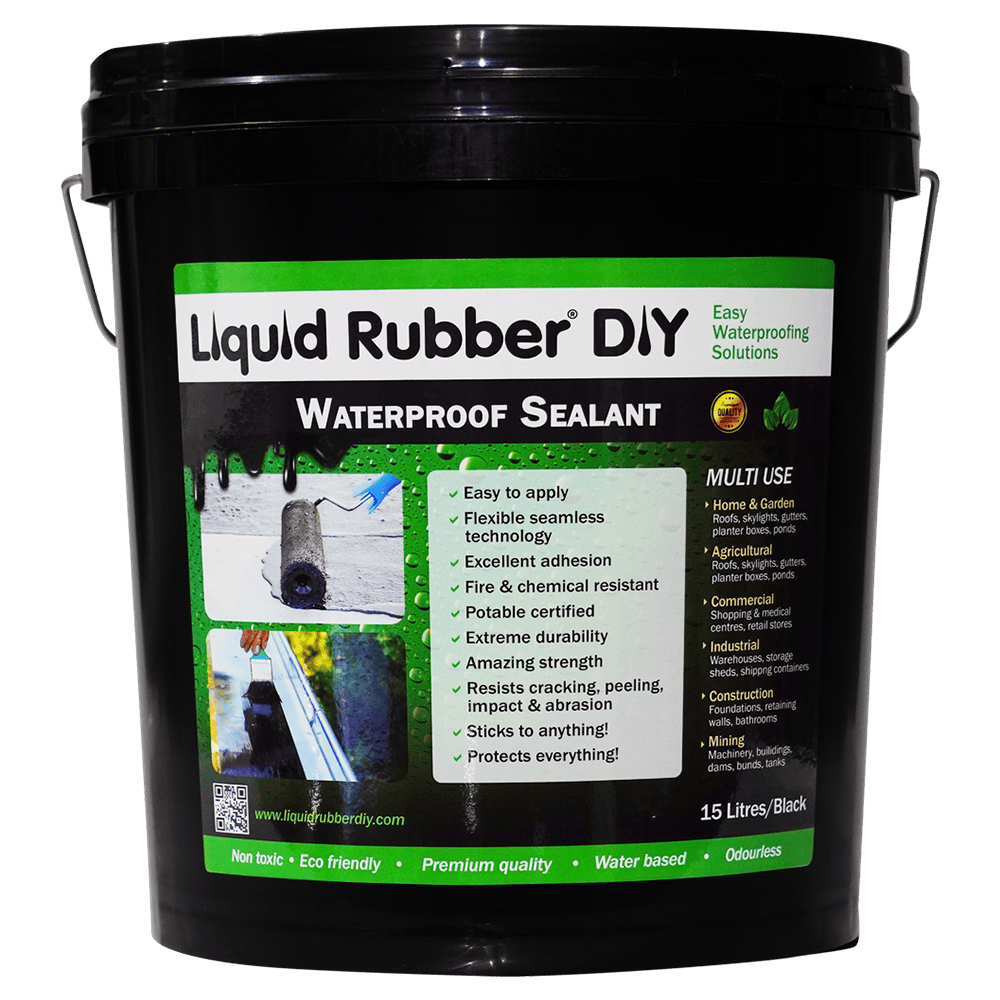
Liquid Rubber DIY Waterproof Sealant


Unmatched performance from the best Liquid Rubber Sealant available

Easy To Apply
Effortlessly apply with a brush or roller - no primer required. Adheres to virtually any surface.

Stretches 1800%
Unbeatable durability and longevity. With 1800% elongation and 95% recovery, it resists cracking and aging

Potable Water Certified
Safe for you and the environment. Our product is non-toxic, eco-friendly, and certified for use in potable water systems. Perfect for water tanks and fish ponds.
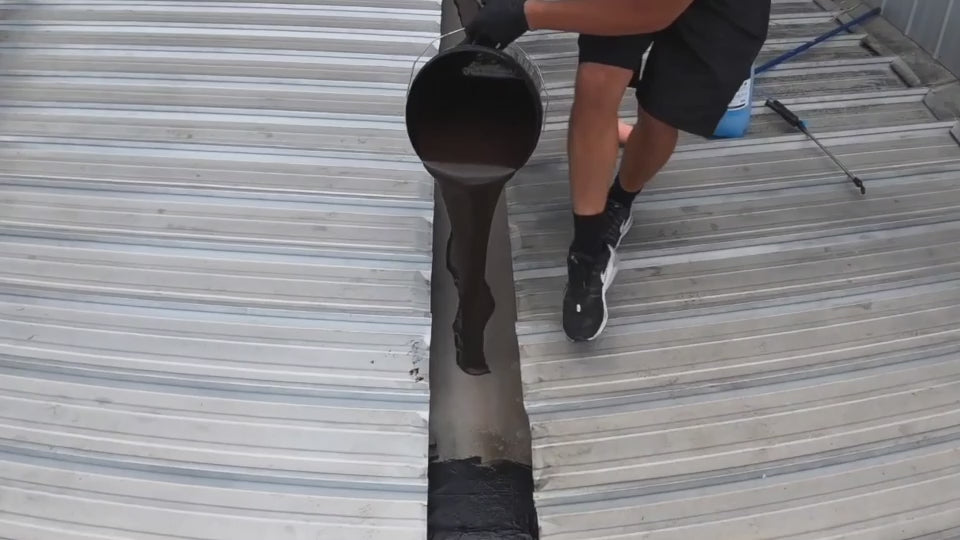
How to apply Liquid Rubber Waterproof Sealant
Product Description
Liquid Rubber DIY Waterproof Sealant is the easy waterproofing solution!
- Water-based
- Potable Water Certified
- Non-toxic
- No-VOC
This Sealant is a simple, no-fuss alternative to conventional hot-applied or solvent-based waterproofing systems. This sealant is an easy-to-apply, multi-purpose, long-lasting, 100% Australian-owned.
Liquid Rubber DIY Waterproof Sealant is extremely stretchy (1800% elongation), flexible, and suitable for use on nearly any surface. Simply paint or spray on the sealant and watch as it instantly molds to whatever shape it's applied.
The sealant then dries to create a flexible and seamless waterproofing barrier that's resistant to cracking and aging.
No Primer needed! Sticks to all surfaces without Primer!
Note: Our Liquid Rubber Waterproof Sealant comes in black and can be easily painted over in any desired color. If you wish to paint over the sealant, first apply one coat of our Sealer on top of the Sealant for optimal adhesion and a smooth finish.
** When Waterproof Sealant is immersed in water, the product will be slightly brown in colour, when dry product is black in colour. **
Frequently bought together for your roof project
Please select the appropriate size


Total price:
Application Examples

Metal Roof

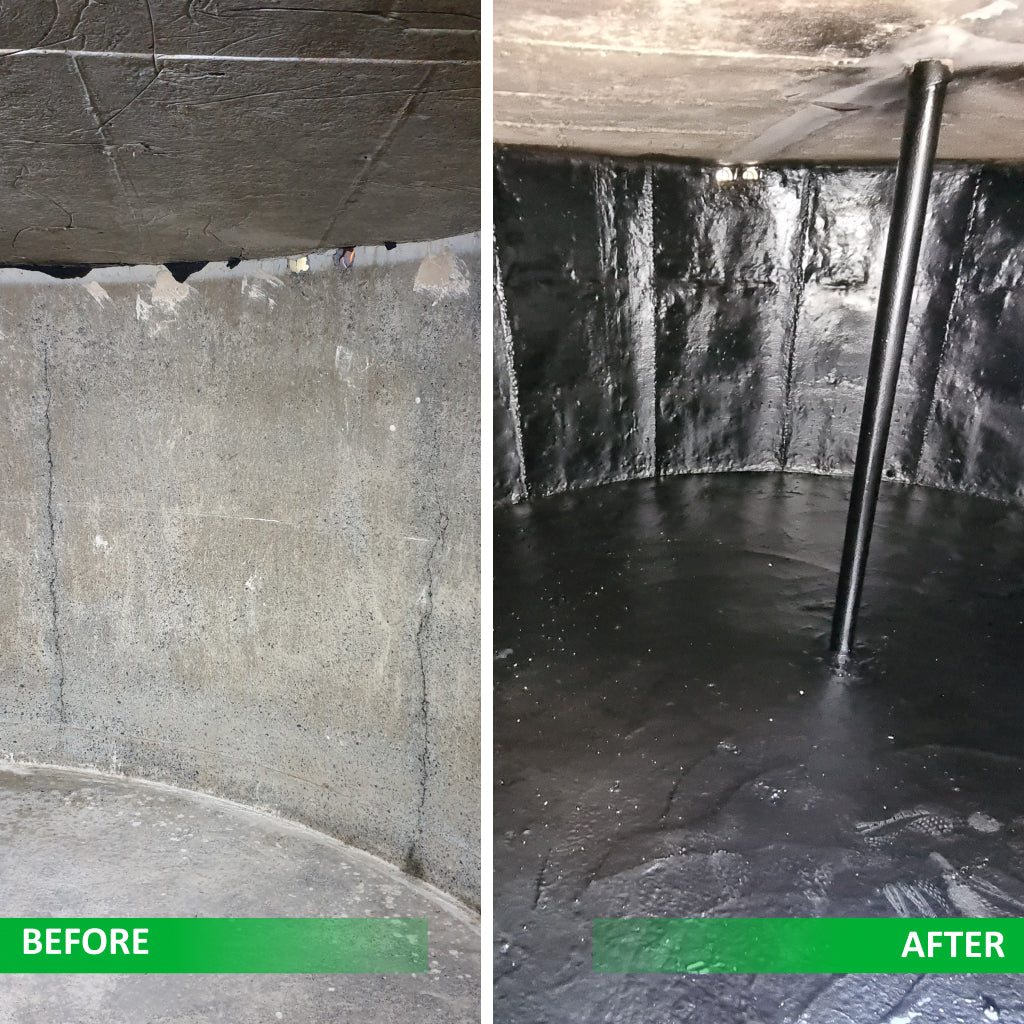
Water Tank

Fish Pond

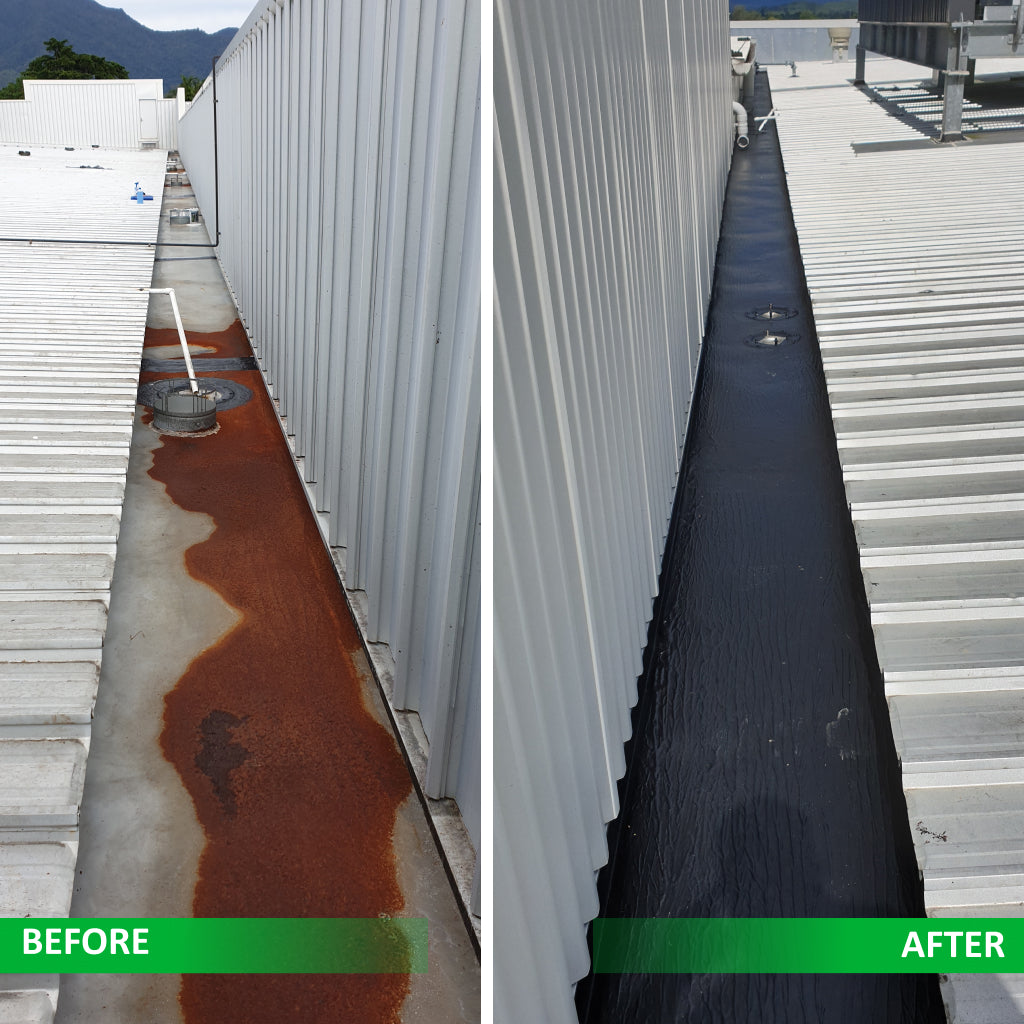
Box Gutter

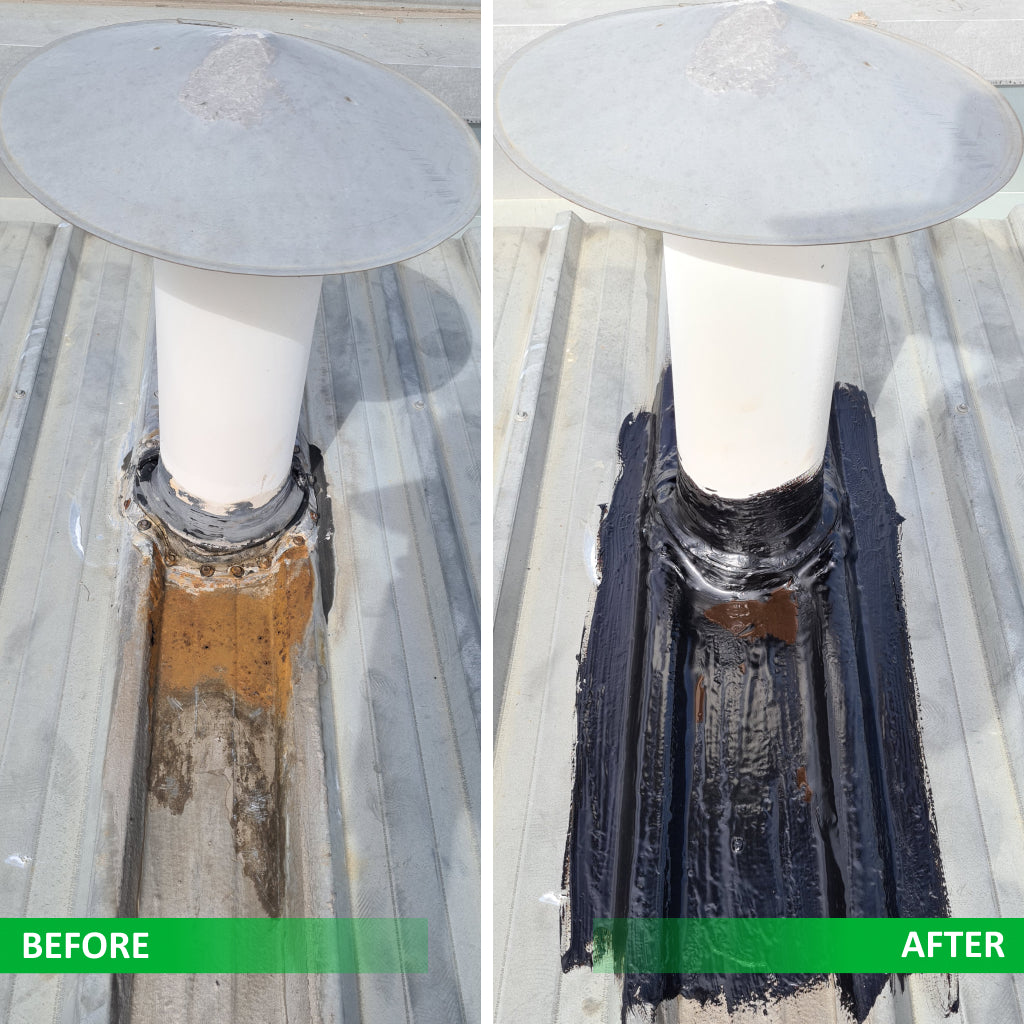
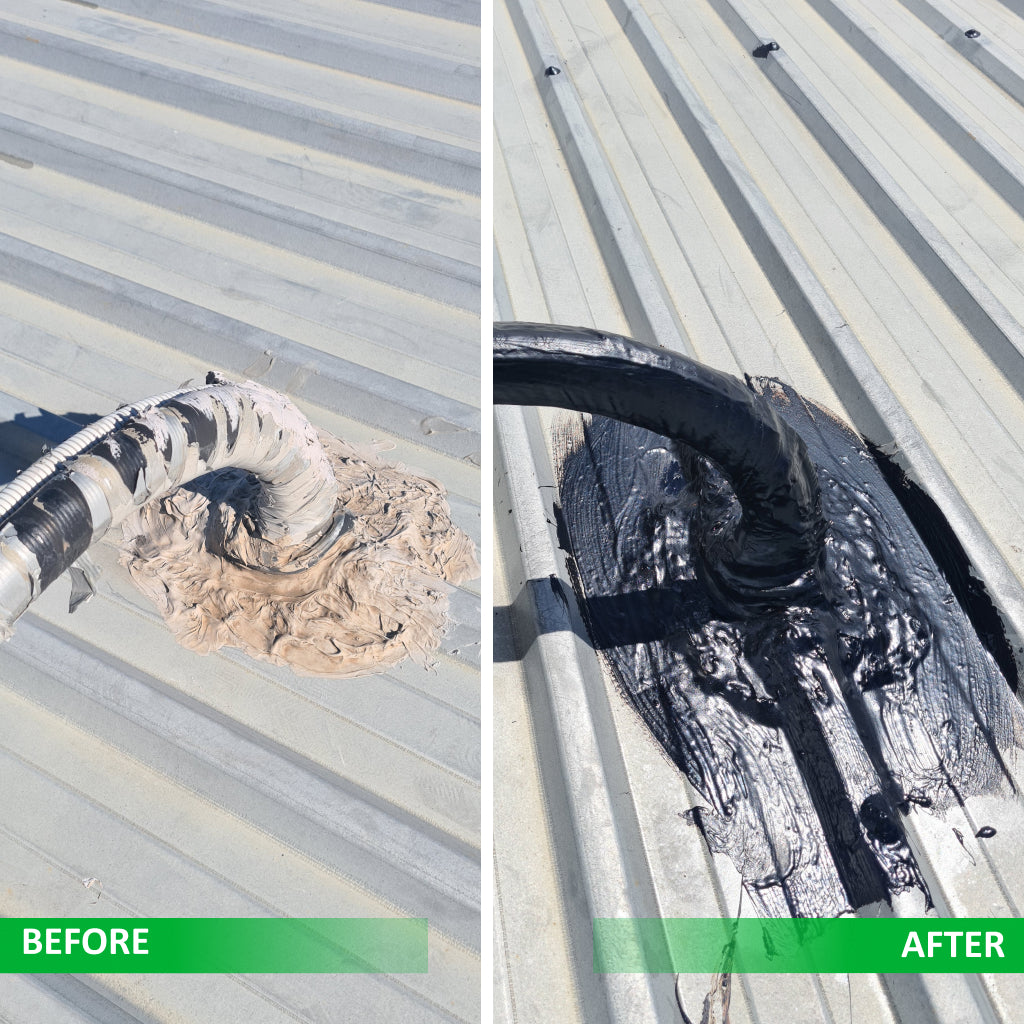
Vents

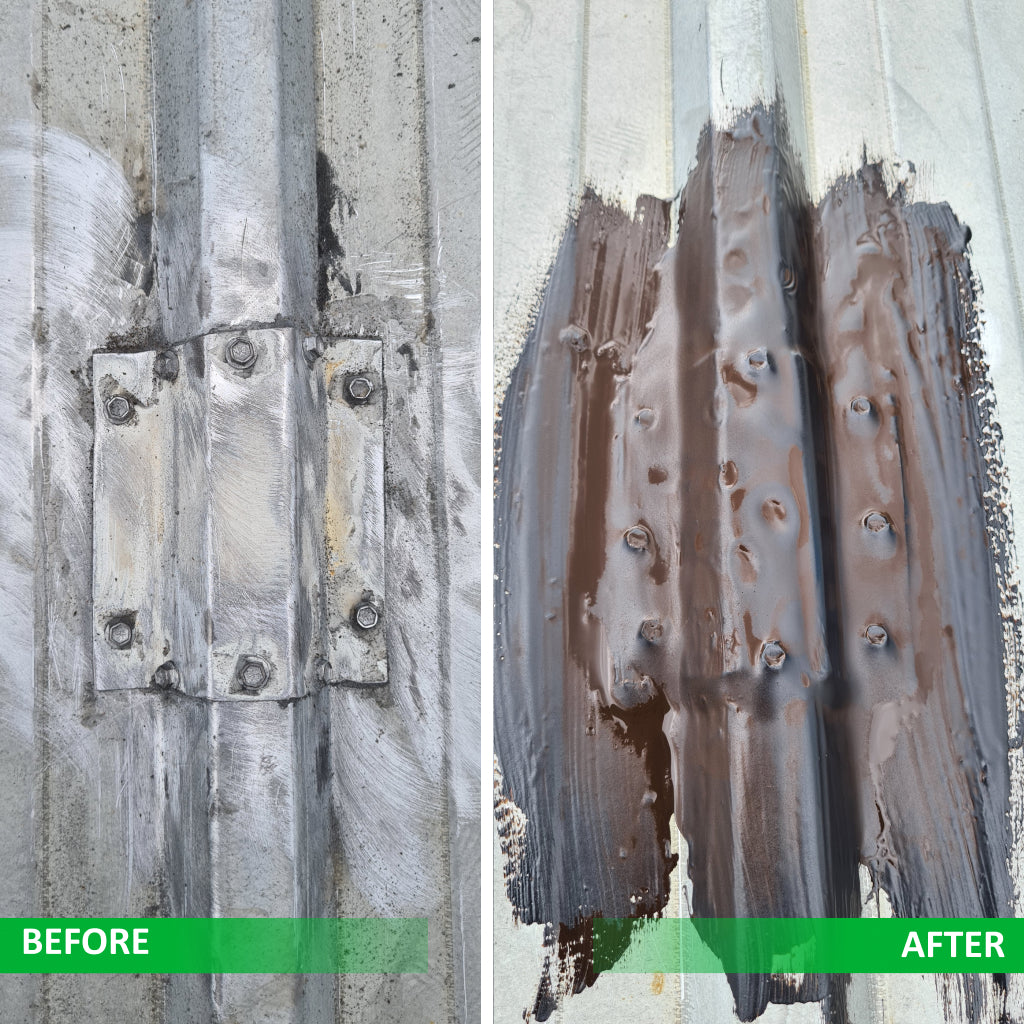
Protrusions

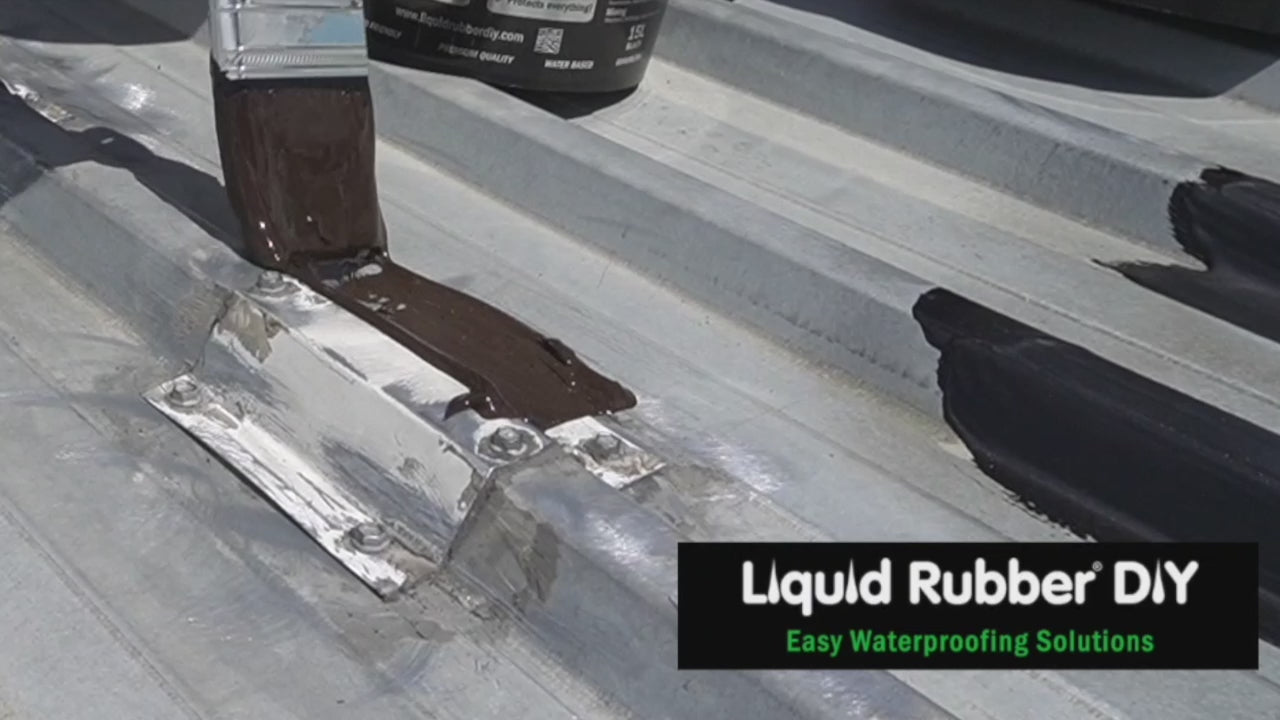
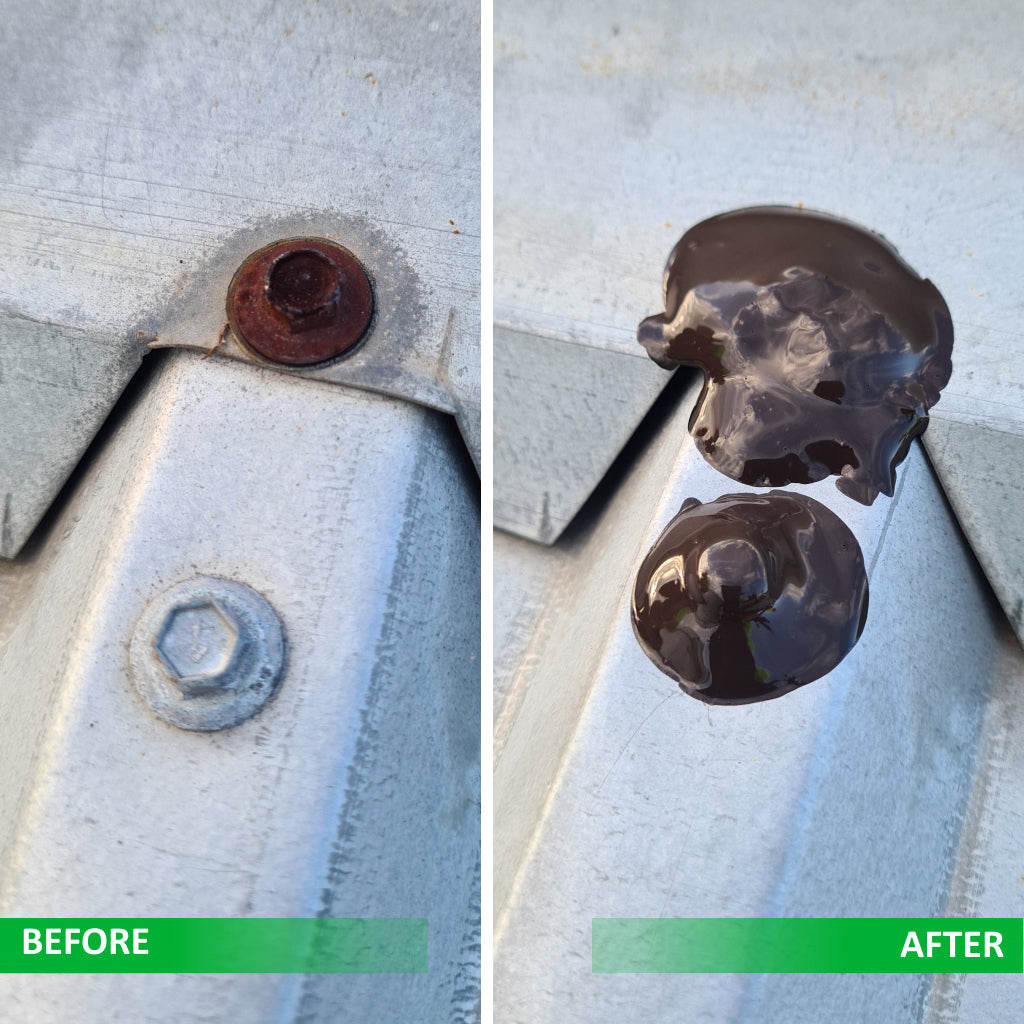
Screws
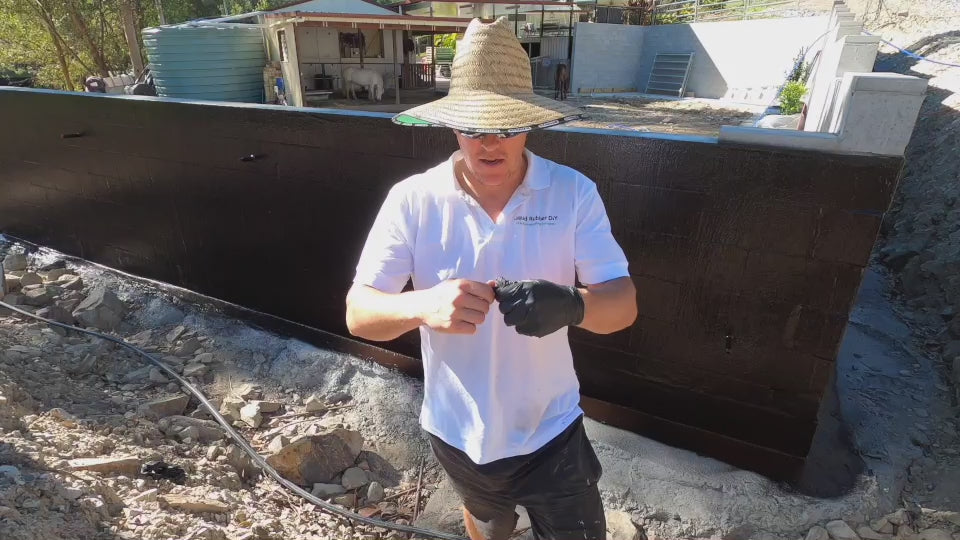
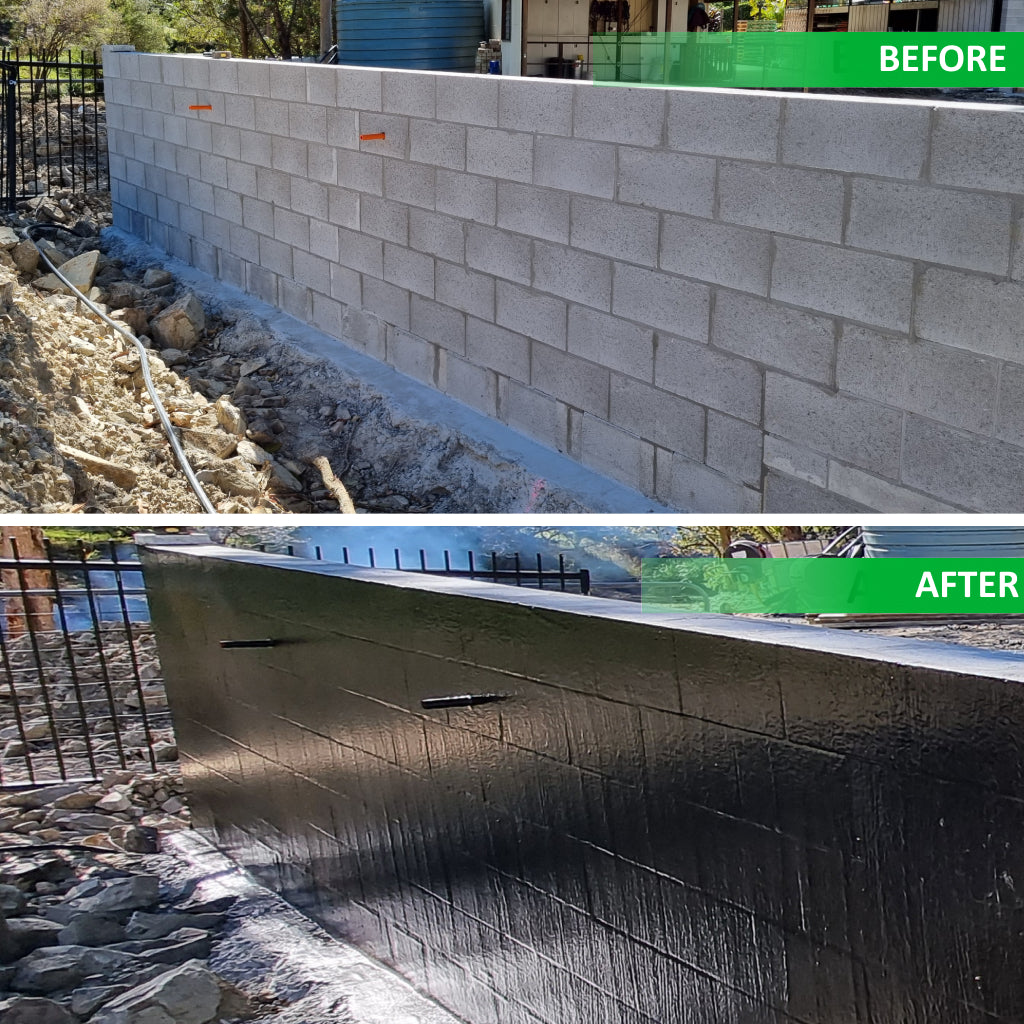
Retaining Walls
FAQ
Liquid Rubber DIY
Metal Roofs:
For general metal roof and rendered concrete coverage, apply 1.5L/m2.
Keep in mind that the coverage will vary depending on the product used:
- 15L Bucket covers: 10m2
- 4L Bucket covers: 2.5m2
- 1L Bucket covers: 1.5m2
Concrete Surface:
For rough or uneven concrete surfaces, apply a minimum of 2L/m2.
On concrete roofs, It is recommended to first apply a 2 Part Epoxy to the surface before applying the rubber to prevent bubbling.
- 15L Bucket covers: 7.5m2
- 4L Bucket covers: 2m2
- 1L Bucket covers: 0.5m2"
- Metal roofs
- Concrete roofs,
- Box gutters
- Tanks and Throughs
- Water Tanks (Potable Water Certified)
- Planter boxes
- Retaining Walls
- Sheds
- Wooden or Metal decks
- Ponds
- and more....
1. Start by cleaning the surface to remove any dirt, oil, or impurities. If needed, use a water blaster or wire brush to remove stubborn debris or rust. Allow the surface to dry completely.
2. Fix areas with holes, cracks, or joint movement using Geo-Textile. Simply embed it into the Liquid Rubber Sealant over the affected areas.
2. Apply the Liquid Rubber to the surface using a brush, roller, or spray machine. Make sure to spread an even layer, each coat should be at least 2mm thick. Be sure to fully cover the surface, including protrusions, for complete coverage.
3. Allow the first coat to dry for at least 24 hours before applying the next coat. Repeat this step until you have achieved the desired thickness.
4. Allow the final coat of Liquid Rubber Sealant to dry completely for a minimum of 24 hours before applying any additional products such as Sealer or Thermal Coating.
5. Clean any excess or dried liquid rubber with mineral turpentine or WD40 before the Rubber Sealant Membrane is fully cured.
6. That's it, you have now successfully waterproofed your surface with Liquid Rubber!
Please Note:
- It is best to apply the product early in the morning or in the afternoon during the summer months, to avoid the intense sun.
- Remember to always apply Waterproof Sealant to the side of the project that will be in contact with water.
- Make sure to avoid using solvents such as petrol, thinners, or diesel when using our water-based products.
- To prevent bubbling and ensure proper curing, do not apply the Liquid Rubber Sealant if there is dew, cold wind, or rain forecasted within the next 24 hours. Also, ensure to prime all concrete surfaces with a high-quality 2-part epoxy before applying the Liquid Rubber.
- The curing time will depend on factors such as temperature, humidity, and airflow. The ideal curing temperature is 20°C or higher. Typically, the curing time is 3-7 days.
- Do not apply in temperatures below 10°C or above 32°C.
- To set the Rubber Sealant quickly, use Rapid Cure Spray (Optional). Note: Do not use a brush or roller on the wet Rapid Cure Spray, as it will cause the brush or roller to harden.
- To use Liquid Rubber for waterproofing, the surface must be clean and dry. Remove any loose materials, dirt, grease, or other substances that could prevent the product from adhering properly.
- If needed, use a wire brush or high-pressure water blasting to clean the surface.
- Make sure the surface is free of mold or mildew and completely dry before applying the product. If the surface is smooth, such as glass or steel, it should be roughened up first.
- Liquid rubber is a safe and eco-friendly option for your DIY projects. It is water-based, which means it doesn't contain any harmful solvents or volatile organic compounds (VOCs).
- It is also UV-stable, meaning it won't break down or degrade when exposed to sunlight. This makes it safe for use both indoors and outdoors.
- Additionally, it is non-flammable and poses no risk to you, your family, pets, or plants.
- So, you can use it with peace of mind, knowing that it is safe for all.
There are several methods for effectively removing liquid rubber, depending on the type of surface it is on and the specific product used.
Here are a few options:
- Solvents: Certain solvents, such as mineral turpentine or WD40, can dissolve Liquid Rubber and make it easy to wipe away. Be sure to test a small, inconspicuous area first to ensure that the solvent does not damage the surface.
- Scraping: A putty knife or razor blade can be used to scrape away liquid rubber. This method is best for small areas or for removing rubber that has not fully cured.
- Heat: Applying heat to Liquid Rubber can cause it to soften and become more pliable, making it easier to remove. A heat gun or hair dryer can be used for this method.
- Mechanical tools: A wire brush or sandpaper can be used to mechanically remove the rubber. This method is best for rough surfaces.
- Peel off mask: You can use a rubber masking liquid that can be peeled off after it has dried.
- When the Liquid Rubber is still wet, it can be easily cleaned off with cold water.
- Once it dries, or cures, you can remove it by using coconut or baby oil.
Liquid Rubber is a great product that is safe to store and transport.
- To keep it in the best condition possible, store it in a cool and dry place above 5°C and make sure it doesn't freeze.
- When you're not using it, be sure to keep the container tightly sealed. This will help the unused Liquid Rubber last longer.
- A pro tip to make it last even longer is to cover the unused material inside the container with plastic wrap or a seal.
We ship our Products throughout Australia and New Zealand.
FREE SHIPPING APPLIED TO ALL ORDERS WITHIN AUSTRALIA
Expected shipment duration: 3-8 Business days within Australia and 6 -26 Days on New Zealand orders.
For larger orders, please contact us at info@liquidrubberdiy.com or use the Contact form.
It comes in dark brown but when cured it turns black.
NOTE: When Liquid Rubber Waterproof Sealant is immersed in water, the product will be slightly brown in colour, when dry/cured product is black in colour.
- The curing process for Liquid Rubber typically takes 24-48 hours, depending on factors such as the thickness of the application, temperature, and humidity.
- While the surface may be touch dry within 2-3 hours, it is important to note that the rubber is still undergoing a process called "curing" which can take up to 7 days. This is when the rubber becomes a single, flexible membrane that can hold water.
- Keep in mind that if the area is damp, such as underground concrete or a pond surrounded by moist soil, this can prolong the curing process.
- It is important not to fill a pond, water feature or water tank until the curing process is complete.
- In some cases, blistering may occur if water vapor is trapped in the substrate. This is more likely to happen when sun or heat is applied and creates water vapor. Allow the blisters to dissipate over time, or repair any holes or cuts in the surface.
- After the membrane has fully cured, check for any cracks, blisters or other surface irregularities that may need to be repaired. To make repairs, use GEO Textile
Yes. Apply one coat of our Primer/Sealer on the Liquid Rubber Waterproof Sealant first and then paint it over with our Thermal Coating or a Paint of your choice.


Share and get 10% off!
Simply share this product on one of the following social networks and you will unlock 10% off!