
TRUSTED BY INDUSTRY LEADERS:


Step 1: Prepare the Surface
Use a leaf blower to remove any excess debris and ensure the surface is completely dry before application.

Step 2: Reinforce Seams, Joins, and Holes
Apply a first coat of Liquid Rubber Waterproof Sealant to these areas using a brush.
While the sealant is still wet, embed the Geo-Textile into the sealant, making sure to smooth out air bubbles and wrinkles.
Once positioned, spray Rapid Cure Spray (optional) to set the product and accelerate drying.

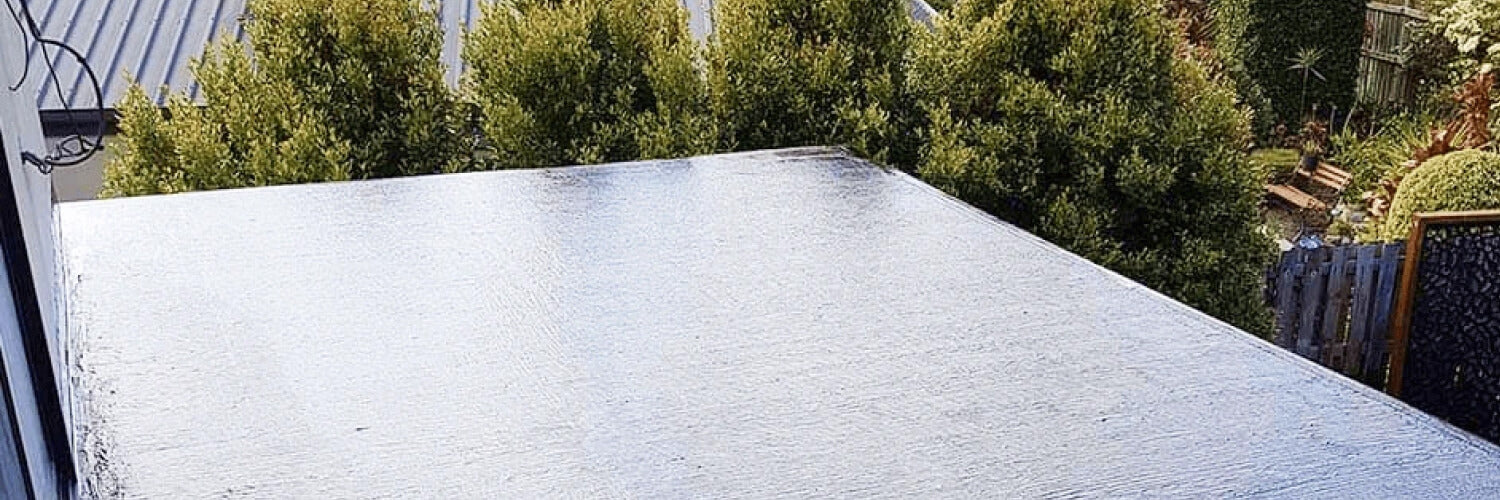
Step 3: Apply 2 Coats of Waterproof Sealant to the Entire Surface
Ensure even coverage for maximum protection. If rain is expected, spray Rapid Cure Spray after application to speed up drying. Recommended thickness: 1.5mm dry-film (approximately 2 litres per square meter).

Step 4: Allow to Cure Before Tiling or Finishing
Typically, a full cure takes 2-3 days before the surface is ready for tiling or final finishing.
BALCONY KIT BUILDER
How big is your Balcony?
Enter your Balcony Area and you're done.
Minimum 0.1 m². Use comma or dot for decimals. Arrow keys adjust by 0.1. Hold +/− to repeat.

Fun Facts About Liquid Rubber

Liquid rubber technology has been around for over 50 years, with early liquid-applied membranes dating even back to the 1960s.

Liquid rubber can stretch up to 1800% without cracking, then shrink back to the same size and restore itself after movement.

NASA Connection – The Liquid Rubber Formulations is inspired by elastomeric coatings designed for aerospace and extreme environments.


Liquid Rubber DIY vs. Traditional Sealants
Compare Liquid Rubber DIY with conventional coatings and sealants.
| Feature | Traditional Sealants | Liquid Rubber DIY Kit |
|---|---|---|
| Waterproofing | Prone to leaks, leaves gaps and cracks. | Fully watertight. Seals your whole surface. |
| Flexibility & Durability | Cracks or peels in heat and cold. | Remains flexible. Never cracks or peels. |
| DIY Friendly | Often tricky to use. May need a pro. | Brush or roll on. Anyone can do it. |
| Eco & Cost Effective | Harsh chemicals, needs frequent recoating. | Water-based, non-toxic. Saves money. |
| Adhesion & Maintenance | Doesn’t stick well, repairs common. | Sticks to any Surface. Low maintenance. |
Waterproofing
Traditional
Prone to leaks, leaves gaps and cracks.
DIY Kit
Fully watertight. Seals your whole surface.
Flexibility & Durability
Traditional
Cracks or peels in heat and cold.
DIY Kit
Remains flexible. Never cracks or peels.
DIY Friendly
Traditional
Often tricky to use. May need a pro.
DIY Kit
Brush or roll on. Anyone can do it.
Eco & Cost Effective
Traditional
Harsh chemicals, needs frequent recoating.
DIY Kit
Water-based, non-toxic. Saves money.
Adhesion & Maintenance
Traditional
Doesn’t stick well, repairs common.
DIY Kit
Sticks to any Surface. Low maintenance.

Balcony Waterproofing FAQs
Can I apply Liquid Rubber over existing coatings or sealants?
For the best waterproofing results, apply Liquid Rubber to a clean, dry surface. Remove loose or peeling coatings, silicone, rust scale, and other contaminants first. This ensures maximum adhesion and long term leak protection.
What tools and equipment do I need to waterproof my Balcony?
Application is simple. Use a paintbrush, roller (included in our kits), or a spray machine for larger Balconies. Basic safety gear such as gloves is recommended, and keep a suitable cleaner handy for spills and tool cleanup.
What is the best way to prepare the surface for application?
Use a power washer to clean the surface. The surface must be clean, dry, and free of debris, mold, and other contaminants.
Do I need to use the rapid cure spray?
The Rapid Cure Spray is used for the Waterproof Sealant to instantly set the product. It is fully optional but we recommend using it for best results.
What colour is the Waterproof Sealant?
The Waterproof Sealant appears brown when wet but turns black when fully cured.
What are the drying and curing times?
Allow each coat of Liquid Rubber waterproof sealant to cure for 12 to 24 hours before re-coating.
Allow the Waterproof Sealant to cure for 48-72 hours before applying protection boards (corflute).
How long does shipping take in Australia?
We ship Australia wide. Orders typically arrive within 3 to 8 business days. Local pickup is also available at 1 Conway Court, Nerang, Gold Coast, QLD 4211.
What spray machines are you using?
We spray Liquid Rubber DIY waterproof sealant with a Graco Mark V airless spray machine.

DOCUMENTATION & MAINTENANCE
DOWNLOAD TECHNICAL DOCUMENTS
Get everything you need: Technical data sheets, and safety information for all products included in your kit.
Technical Data Sheets
Safety Data Sheets

Liquid Rubber DIY Waterproof Sealant
Liquid Rubber DIY Waterproof Sealant
Liquid Rubber DIY Waterproof Sealant

Geo Textile
Geo Textile
Geo Textile
